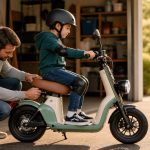
Learning how to brake on a kick scooter is really learning to manage speed before the emergency. A rear-fender brake works best with early, progressive pressure and stable weight. A hand brake may add control, but its response differs by model. Neither system makes a steep hill, wet surface, or traffic a suitable practice area.
Start on dry, smooth, level pavement away from vehicles and pedestrians. Wear a properly fitted helmet and appropriate pads. Children need active adult supervision.
Identify the Brakes
- Rear fender: the rear foot presses a metal or composite fender toward the wheel.
- Hand brake: one or two levers operate cable, rim, drum, or disc mechanisms.
- Front and rear levers: some large-wheel scooters use independent brakes; learn the exact lever mapping.
- No approved brake: do not ride until the scooter is correctly equipped and repaired.
Read the manual. Razor’s Flashback manual, for example, maps front and rear levers separately and recommends practicing at different speeds in an open area before riding around others. That mapping does not apply to every scooter.
Inspect Before Practicing
- Walk the scooter and apply each brake.
- Confirm positive engagement before a lever reaches the grip.
- Release and check that the wheel moves freely.
- Inspect the fender, cable, pads, rotor, wheel, axle, and fasteners as applicable.
- Stop for cracks, frayed cable, leak, loose mount, severe rub, or inconsistent response.
Use our brake adjustment guide only after identifying the system and consulting the exact manual.
Compare fitted helmets, pads, and manufacturer-correct brake parts: [AFF-LINK]
Set a Stable Riding Position
Keep the lead foot planted near the front-middle of the deck, both hands on the bars, knees soft, and eyes ahead. The rear foot must reach the fender without forcing the lead foot sideways or placing the heel beyond the deck.
As braking begins, lower slightly and move weight back without locking the arms. Do not hang far behind the bar; the goal is to reduce forward load while keeping steering controlled.
Rear-Fender Brake Technique
- Stop pushing and let the scooter settle into a straight glide.
- Look ahead to the desired stopping point.
- Place the rear foot squarely on the brake.
- Shift weight modestly back and bend both knees.
- Add pressure gradually until speed drops.
- Keep pressure until the scooter fully stops.
- Step down with the rear foot while holding the bars straight.
Do not stamp the brake or deliberately lock the rear wheel. Skidding reduces directional control and wears a flat area into the wheel. Brakes can become hot after repeated or long use; do not touch them immediately.
Hand-Brake Technique
Cover the lever with the number of fingers the manufacturer allows while maintaining a secure grip. Squeeze progressively rather than grabbing. If the scooter has two independent levers, learn which controls the front and rear before moving.
A strong front brake can shift weight sharply and may skid the front tire if misused. Practice each approved brake at very low speed, then practice the manufacturer-recommended combined method. Keep the scooter upright and straight during the earliest drills.
Drill 1: Walking Brake Test
Walk beside the scooter, push it gently, and apply the brake. Repeat ten times. This confirms engagement and release while teaching foot or hand location. Any change in feel stops the drill for inspection.
Pass test
The scooter stops predictably ten times and rolls freely after each release.
Drill 2: Stop in a Wide Box
Mark a start line and a three-foot stopping box 20–30 feet away. Take one gentle push, glide straight, and begin braking early enough to finish inside the box. Keep the start speed consistent.
Pass test
Ten stops inside the box without skidding, stepping off early, turning across the lane, or crossing the far edge.
Drill 3: Measure Stopping Distance
At the same modest speed, mark where braking begins and where the front wheel stops. Repeat five times. The longest result—not the shortest—is the useful baseline. Add a large safety margin for real riding.
Repeat only at a slightly higher safe speed after consistency. Stopping distance grows with speed and worsens with poor traction, worn parts, fatigue, or downhill grade.
Drill 4: Planned Stop and Step-Off
Brake nearly to zero, place the rear foot on the ground, and walk the final inch of movement. Practice keeping the scooter beside the body rather than letting it roll into the path.
Pass test
The rider can stop and dismount on either side at walking speed while both hands remain on the bars.
Speed Control Before a Turn
Finish most braking while the scooter is straight. Enter the turn at a speed that needs little or no braking, look through the curve, and use small steering inputs. Hard braking while sharply turned reduces available traction.
Slow before pedestrians, blind corners, driveway crossings, surface transitions, and downhill sections. If a route requires continuous braking, walk the scooter instead.
What Changes Stopping Distance
- Higher starting speed
- Downhill grade and rider/load mass
- Wet, sandy, gravelly, leafy, painted, or broken surfaces
- Small hard wheels and worn tread
- Brake wear, heat, adjustment, or contamination
- Delayed reaction, distraction, and fatigue
- Turning while braking
These factors compound. A small-wheel scooter on a damp descent is not simply a slightly longer version of a dry flat stop.
Emergency-Braking Priorities
Look for open space, straighten as much as possible, apply the approved brake progressively and firmly, lower the body, and keep both hands on the bars. Do not aim for a skid. Avoid steering into traffic or a pedestrian to save the scooter.
Emergency technique is not permission to follow closely. Maintain space so ordinary progressive braking handles most situations.
Build a decision habit
During practice, have a supervising adult call “stop” at unpredictable but safe moments. The rider should look ahead, straighten, brake, and finish inside the lane. Begin at walking speed and keep generous space. This drill trains the sequence without creating a real surprise obstacle.
If the only open route leads onto a road, down stairs, or toward another person, the practice area itself is unsuitable. Move to a larger closed space instead of trying to simulate emergencies beside hazards. Children should never practice sudden stops without an adult controlling the area.
Common Braking Mistakes
- Waiting until the obstacle is close
- Looking down at the brake instead of ahead
- Stamping the fender or grabbing a front lever
- Moving the lead foot during the stop
- Practicing first on a hill
- Dragging the brake continuously
- Riding through a change in lever feel or brake noise
- Touching a hot brake after repeated stops
Frequently Asked Questions
Can I stop by dragging my shoe?
Use the scooter’s approved brake. Shoe dragging is inconsistent, reduces balance, and wears footwear; a controlled low-speed step-off is an exit, not a high-speed brake.
Why does my rear wheel skid?
Pressure may be too abrupt, weight too far forward, speed too high, or traction poor. Return to a dry flat low-speed drill and inspect the brake and wheel.
Which brake should I use first?
Follow the exact manual. On a rear-fender model use that brake; on dual-brake models learn the mapped levers and manufacturer-recommended combination.
Can I practice braking in the rain?
No. Wet weather reduces traction, visibility, and braking performance. Choose dry conditions.
Bottom Line
Good braking begins before the stop: correct equipment, open space, modest speed, eyes ahead, and a generous margin. Apply the approved brake progressively, keep the scooter straight, measure consistency, and walk any route whose grade or surface exceeds the rider’s practiced control.